Sending Linux Logs to Qradar
Sending Linux Logs to IBM Qradar is a complex process for beginners . Its a process of collecting and forwarding Linux system logs to a Qradar SIEM platform. This enables centralized monitoring, analysis, and detection of security threats, compliance violations, and operational anomalies. By integrating Linux logs with Qradar, organizations can gain valuable insights into their IT infrastructure and enhance their overall security posture.
Introduction
IBM QRadar is a comprehensive security information and event management (SIEM) solution that helps organizations detect and respond to threats in real time. One of the essential tasks in setting up QRadar is configuring it to receive logs from your Linux systems. This guide will walk you through the process step by step.
Sending Linux Logs to QRadar
Prerequisites
- QRadar installed and accessible.
- A Linux server from which you want to send logs.
- Administrative access to both the Linux server and QRadar.
Step 1: Configure QRadar to Receive Logs
- Log in to QRadar:
Access your QRadar instance through a web browser with your Qradar IP’s
Log in with administrative credentials
- Add a Log Source:
Navigate to the Admin tab. Under the “Data Sources” section, click on “Log Sources.”
OR
you can see direct option of log source so Click on the “Add” button to create a new log source
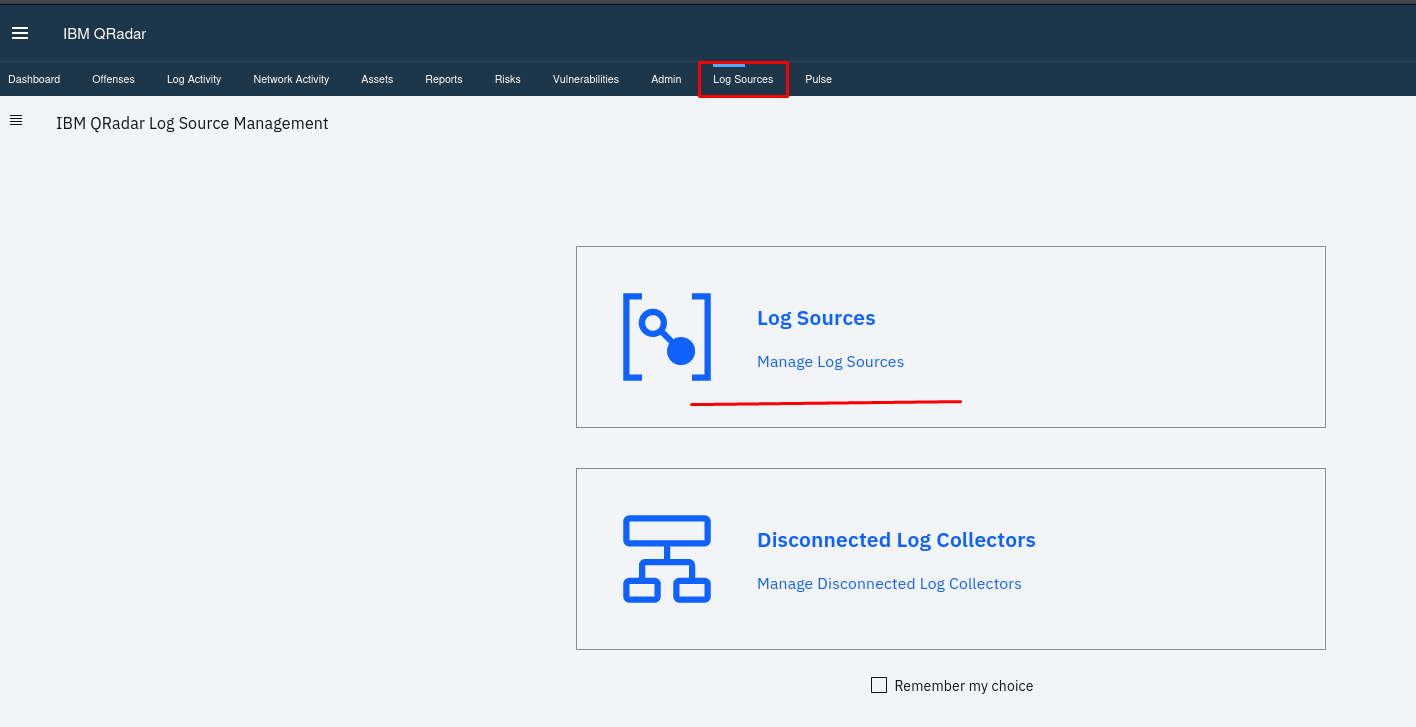
Add your New Log Source then Configure the log source details like single log sources or multiple log sources


In Log Source Type: Select the appropriate log source type (e.g., Linux OS). In Protocol Configuration: Choose “Syslog.”
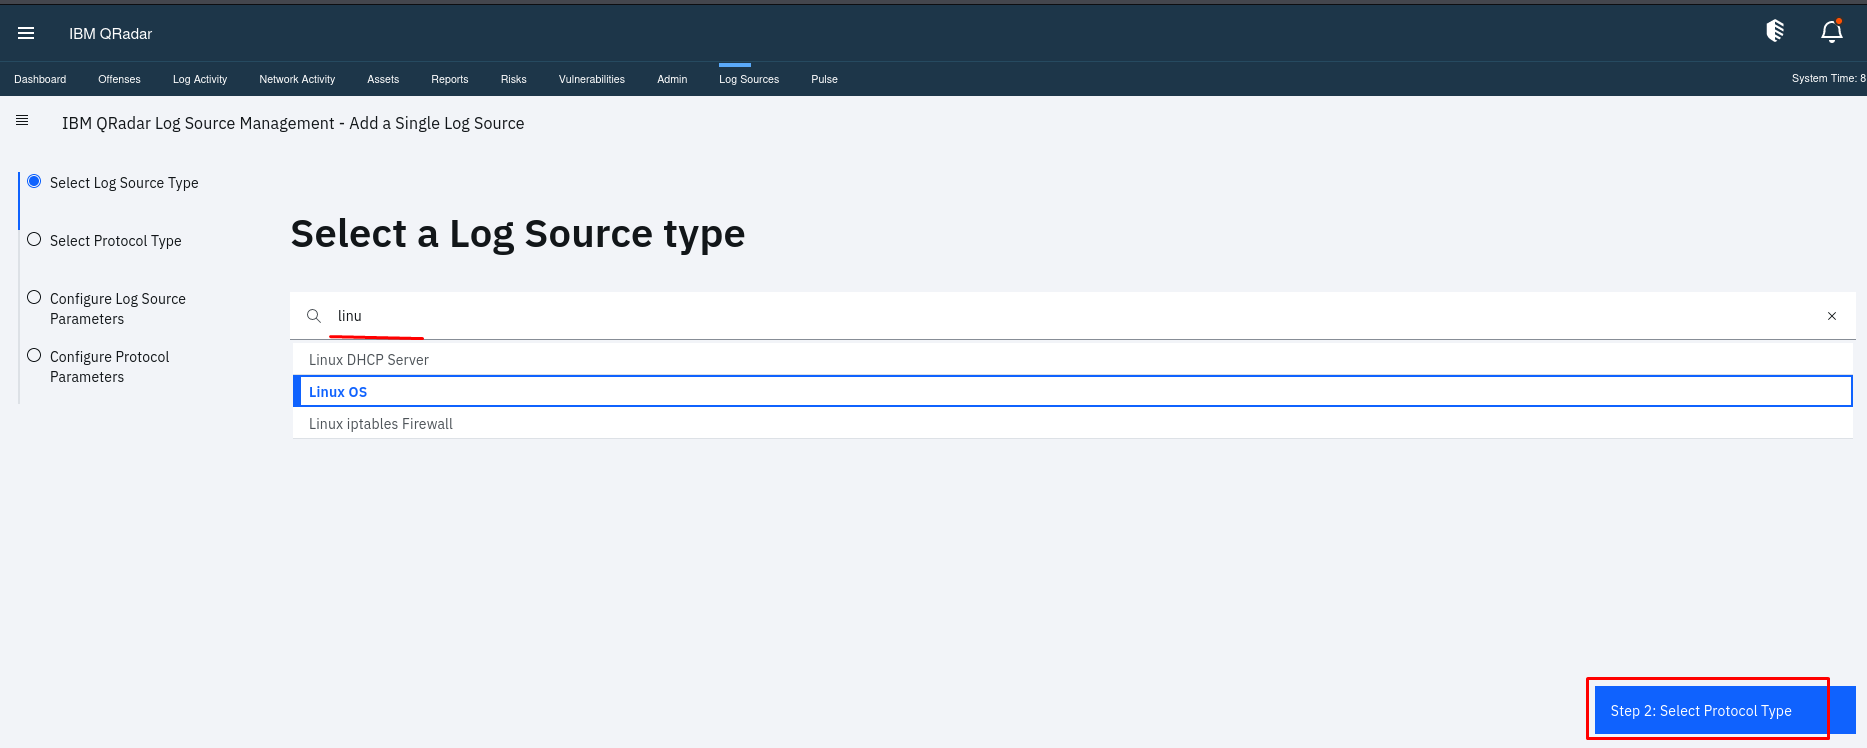
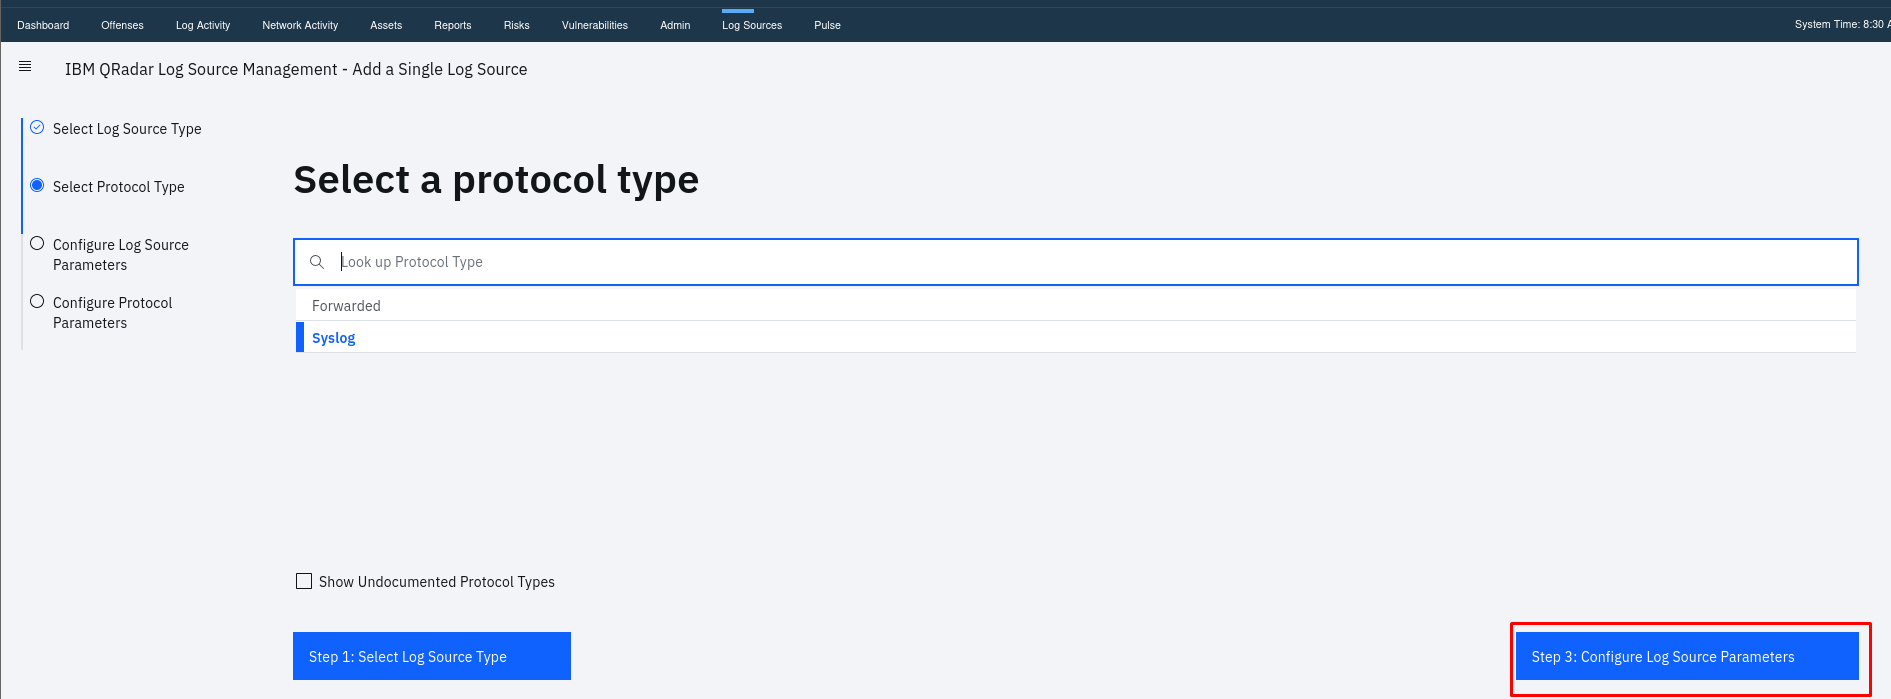
In Log Source Name You can Provide a meaningful name for the log source. Then Paste you kali linux ip or your any Linux OS IP in log source Identifier then Click “Finish.”
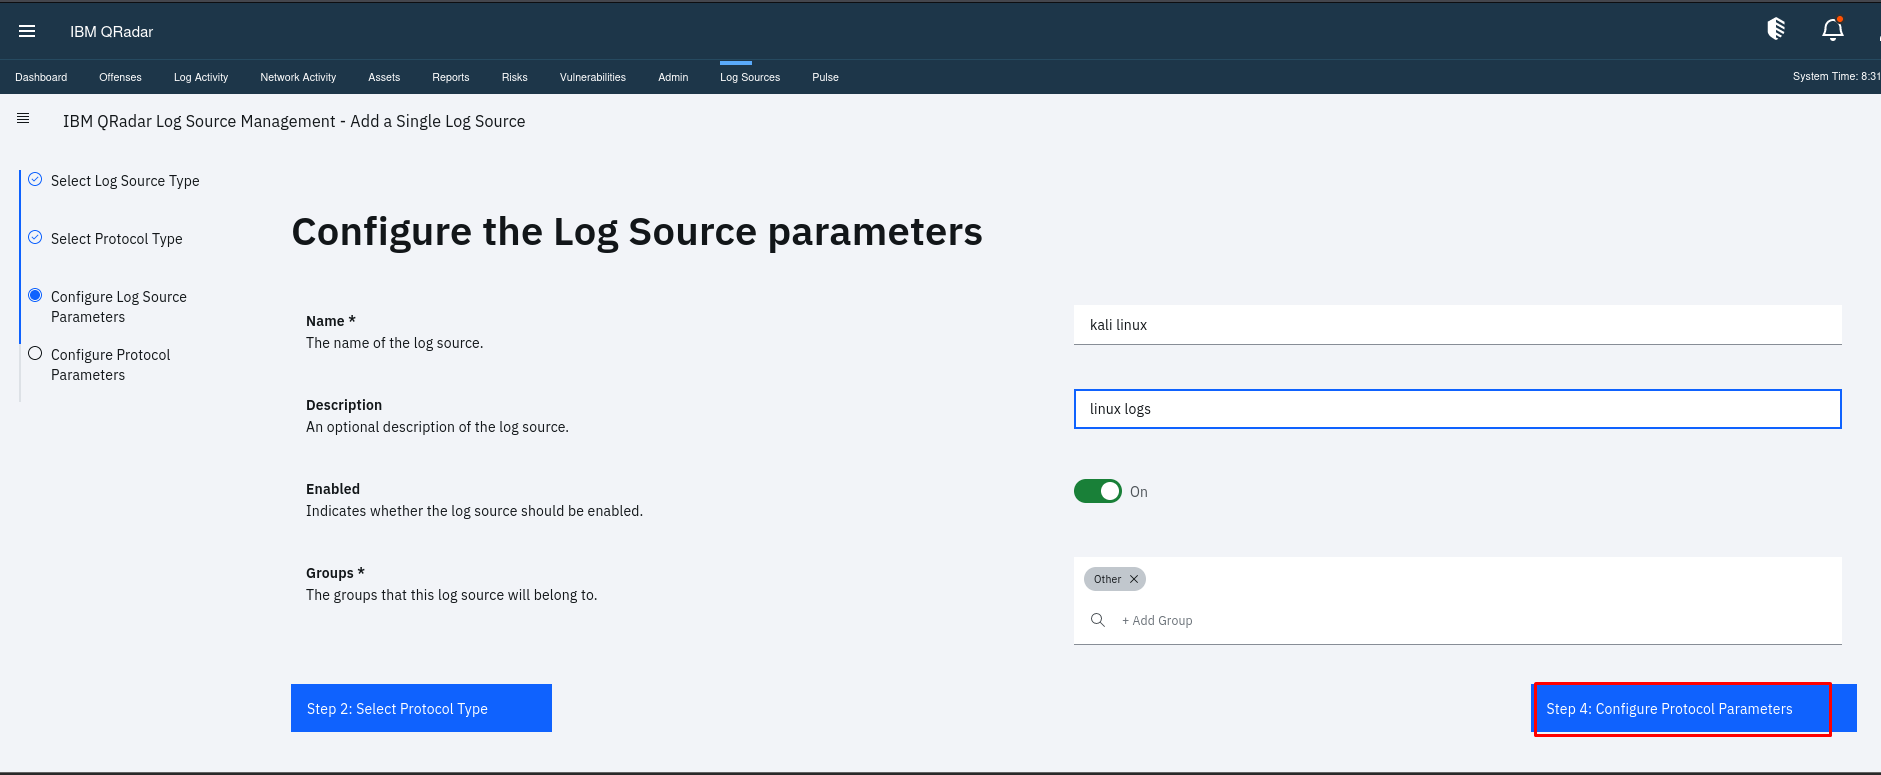
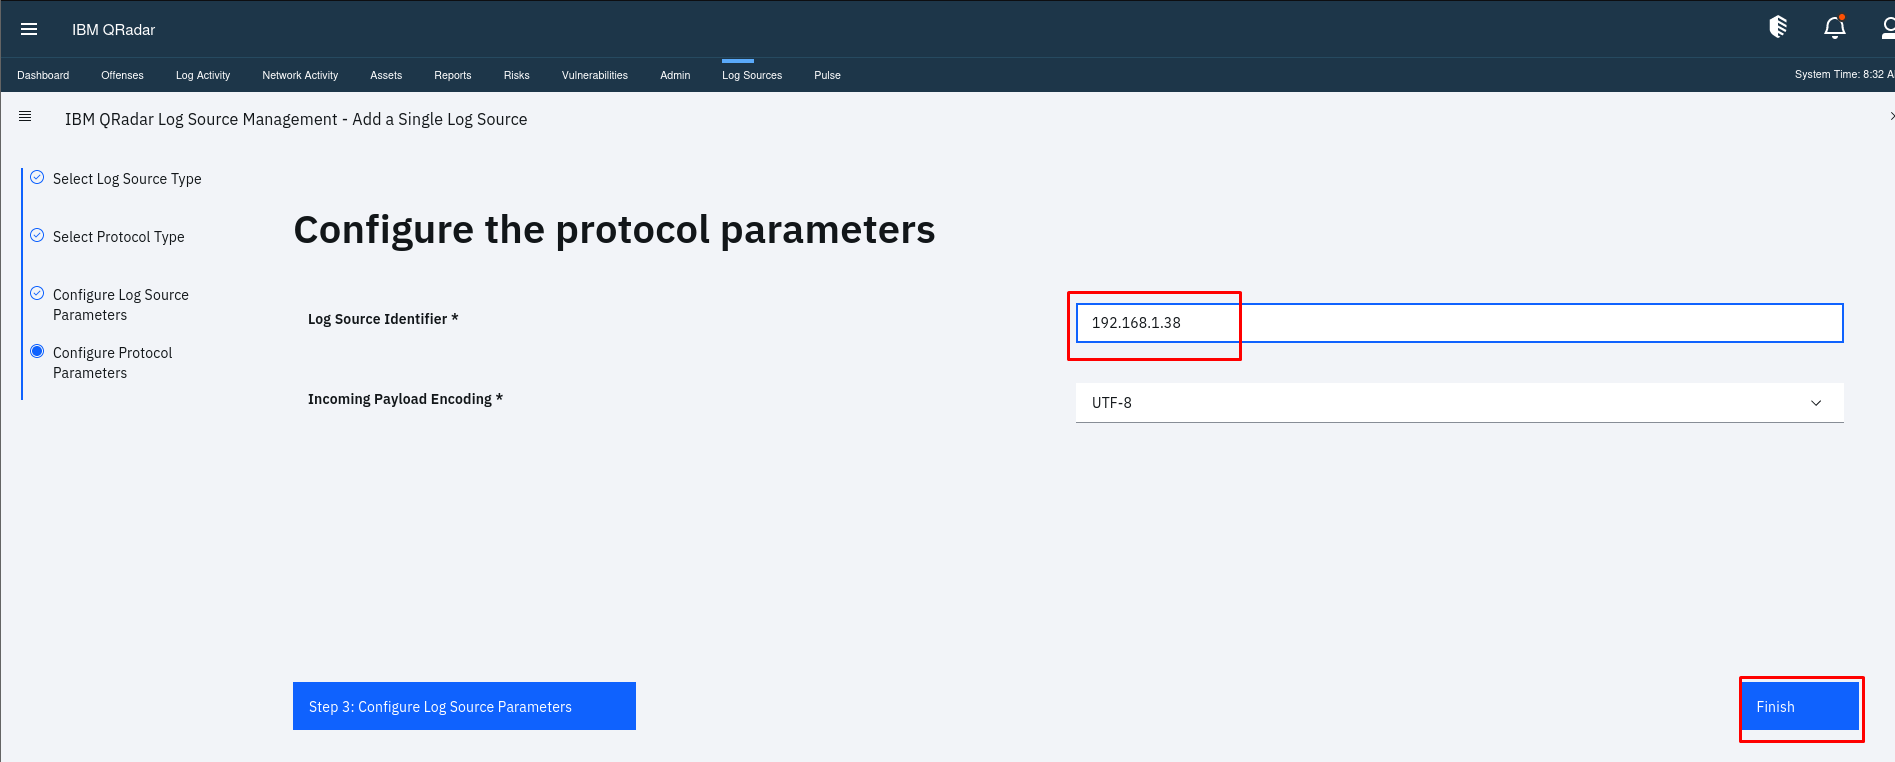
Step 2: Install and Configure Rsyslog on Linux
- Install Rsyslog:
Most Linux distributions come with Rsyslog pre-installed. If not, you can install it using your package manager.
- Configure Rsyslog to Send Logs to QRadar:
Edit the rsyslog configuration file (usually located at /etc/rsyslog.conf or /etc/rsyslog.d/50-default.conf).
Uncomment following lines
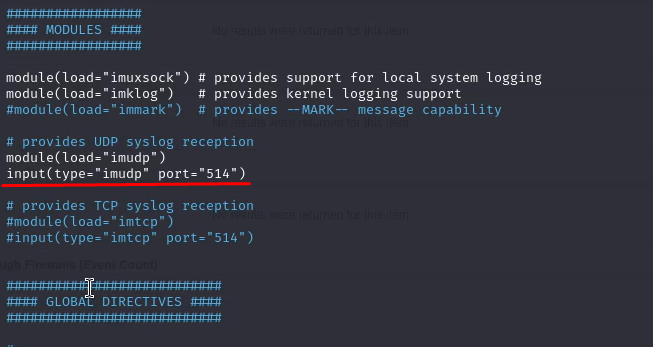
Add the following lines at the end of the file to forward logs to QRadar. Replace qradar_ip with the IP address of your QRadar server.
Press CTRL+X and then Press Y , Save and close the file
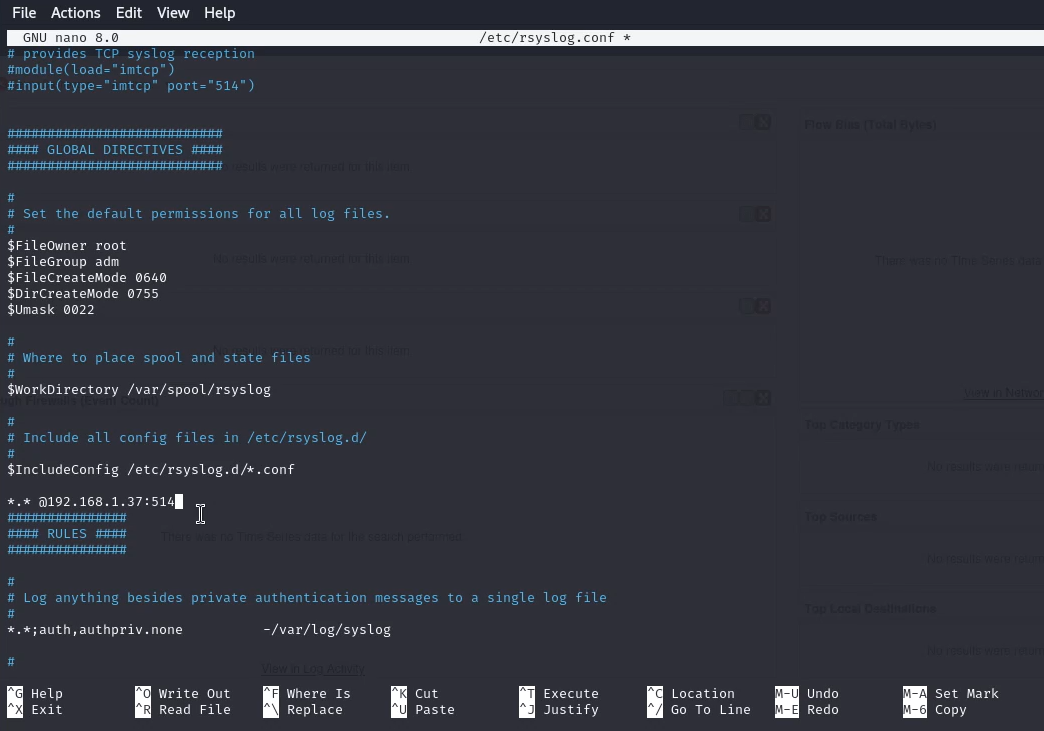
- Restart Rsyslog:
Restart the Rsyslog service to apply the changes.
Step 3: Verify Log Reception in QRadar
- Check QRadar Log Activity:
Go to the “Log Activity” tab in the QRadar web interface.
– Set the time range to display recent logs.
– You should start seeing logs from your Linux server. Use filters to locate logs from your newly added log source
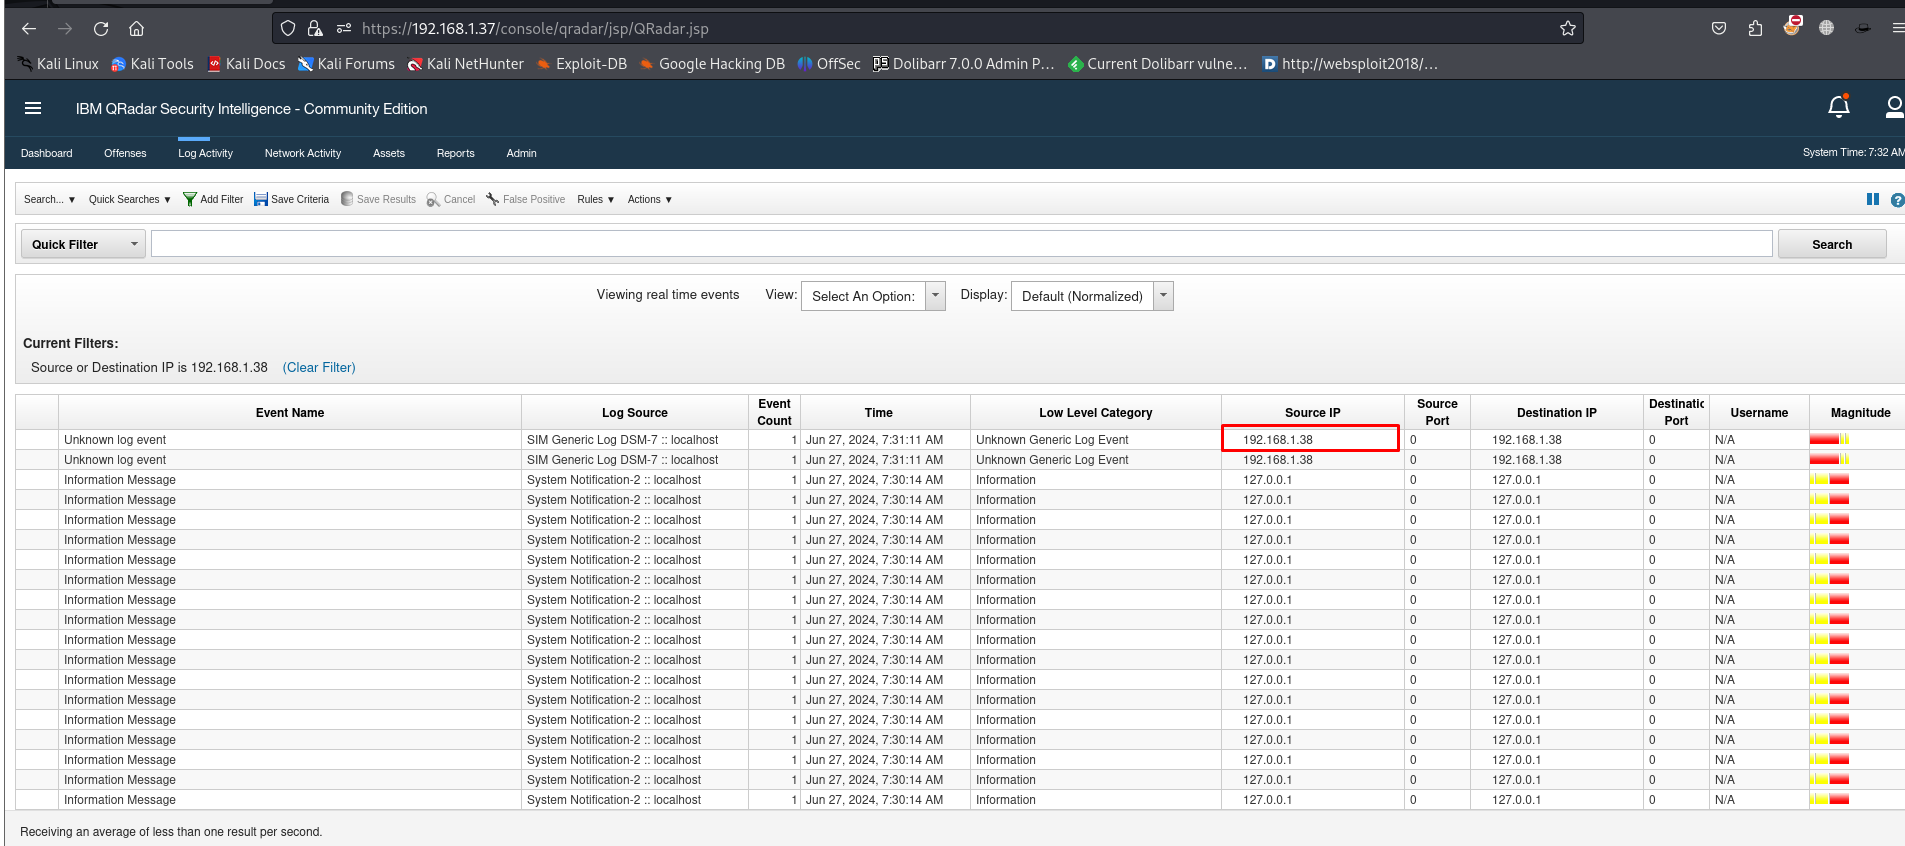
Cross Verifying Log Delivery to QRadar (Optional)
It’s crucial to ensure your Linux logs are reaching QRadar for effective security monitoring. Here, we’ll demonstrate how to verify log delivery and simulate log messages for testing.
Simulating Log Messages
We can use the logger command to send a test message to the system logs. This message will then be forwarded to QRadar if configured correctly. Here’s an example command that sends the message “hello there”:
sudo logger ” hello thor “
This will create a log entry that you can then look for in QRadar to confirm successful delivery.

Now we can use the tcpdump command to capture network traffic on the Linux system. This can be helpful for troubleshooting specific connectivity issues. However, the focus for most users should be on using the logger command for basic verification.
sudo tcpdump -nnAs0 -i eth0 host <localhostIP> and port 514

We can see our local host successfully sent logs to Qradar
